3461 Éléonore Pull-On Jeans
It was this picture that caught my attention first. Wow, I thought, these are awesome jeans! (I like that fabric, too!) THEN I read the description; Pull-on jeans! The best of both worlds!
I read the reviews: (click here) then bought the pattern. I already had a piece of stretch twill, pre-washed and ready to sew. Black. Cat hair magnet. Anyway…..
Before I traced off my size, (I never cut a master pattern), I checked the “rise”. It’s a “below the waist fit”. Not for me. Three children, a few years, an appreciation of wine, you get the drift.
I added 2 inches to the rise, then made these jeans. The instructions are fantastic. Hint: I print the instructions from the Jalie website so I can keep it handy beside my machine. One other change I made was to shorten the elastic by 2 inches for both the front and back. I wanted to avoid “plumbers’ crack”.
I completed the jeans, tried them on, and OMG, I LOVE them. The fit is perfect. (Almost)
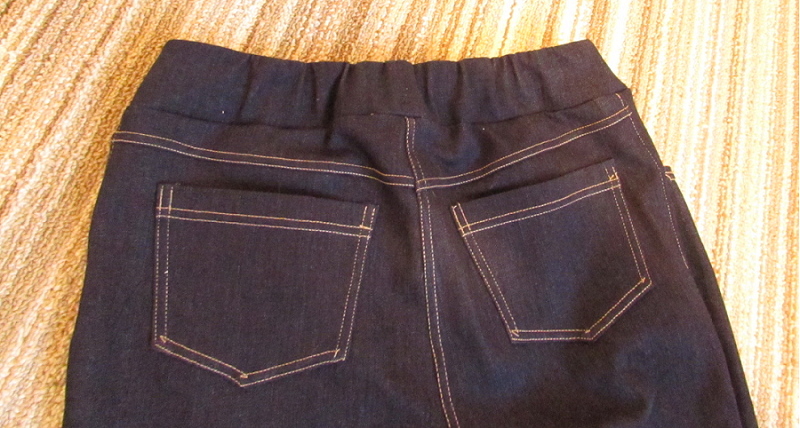
On the next pair I changed the rise adjustment from 2 inches to 1 1/2 inches. And changed the front false pocket to a real one. And not use black fabric. It doesn’t photograph well. So this is my next pair, in a stretch denim.
The photo doesn’t do the fabric justice. It’s a rich denim blue with 20% stretch, perfect for this pattern.
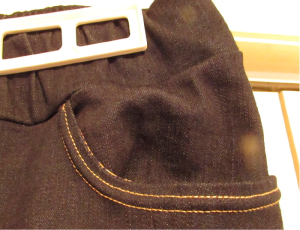
I added real pockets to the fronts. The original pattern has an insert to give the illusion of a pocket which gave me a starting point. To keep bulk to a minimum, I used a cotton print for the lining. If you’d like a detailed description of how I drew and sewed the pockets, please email me at: yvettechilcott(at)yahoo(dot)ca with your request and I’ll write it up.
All my top stitching was done using Sulky 12 weight cotton and a Schmetz twin needle size 100/6mm.
I recently became a Husqvarna Viking Epic owner, and have been sewing up a storm. These jeans gave me a reason to finally open the embroidery unit. This raw edge applique design is one of the many that are included in the machine. I embroidered 3 flowers in total, 2 are design size and 1 enlarged. I used the reverse side of the denim for the applique and a Sulky variegated rayon embroidery thread.


Yvette, love the jeans! Will you do a workshop on these at the store? Love your site! Heather
Hi Heather, thanks for the kind words. I think Laura can fit me in for early spring where we’ll do a capri version. Please let Pine Ridge Knit & Sew staff that you are interested, thanks in advance.
Would love a workshop on these jeans!! Capri version is a fantastic idea
Good to hear that Suzanne! Watch for it on Pine Ridge Knit & Sew’s calendar.
What a rave review! When you say that you lengthened the rise- did you lengthen both in the front and back, or only the back? I’m ready to give these a try!
Gee THANKS Ann! I lengthened both the front and the back, the same amount. I’ve written a tutorial and it will be featured on the Curvy Sewing Collective mid February.
I would also like to see your tutorial on how to add the 1 1/2 inch to the rise but can’t seem to find it on the curvy sewing collective. I made a cropped pair of these pants and they were quite low as well as too big on the waist. So do I just cut the elastic smaller and stretch to fit? Thanks for your help, Joanne
Hi Joanne, I cut the elastic 2 inches shorter, both front and back. My tutorial on lengthening the rise was part of the February Pant Month on the Curvy Collective, and I think if you use the search function on the site you’ll find it. If you can’t, please let me know and I’ll help you locate it.
You’re awesome, you’re like my deceased mom. She could do anything k everything. I was born in Cuba & she used to take me to the expensive store, “ El Encanto” (was burned by Fidel Castro) & I show the cloth I really like & she drew a croquis & surely she made the same way. Congrats to you 👏🏼 If I made have the PDF sent to my email if isn’t too much to ask? Thanks 🙏
thank you for sharing your memory with me. I’ve sent the PDF to you, wishing you all the best Sara!